About
I'm a final year international student on BSc Games Design and Programming course at Staffordshire University. Currently based in Stoke-on-Trent, UK.

Games Design and Programming
I'm a final year international student on BSc Games Design and Programming course at Staffordshire University. Currently based in Stoke-on-Trent, UK.
Final year undergraduate student looking to further develop my programming skills through my contribution in the game industry. Open to relocating for the right opportunity.
Course: BSc (Hons) Computer Games Design and Programming
School: Staffordshire University
Date: September 2017 - present
Final Year Project: Custom shaders in UE4 via HLSL and
Material Editor
| Module | Skill | Grade |
|---|---|---|
| Advanced Graphics and Real-Time Rendering | DirectX 11, C++ | 62% |
| Individual Games Technology Project | UE4, HLSL | 95% |
| AI Scripting for Games | Unity, C# | 73% |
| Further Games and Graphics Concepts | DirectX 11, Physics | 79% |
| Social and Mobile Game Development | Unity, C# | 77% |
| Advanced 3D Game Engines | UE4, blueprints | 95% |
| Game Engine Creation | C++, SDL | 84% |
School: United World College in Mostar (International Baccalaureate Diploma)
Total Score: 38
Date: August 2014 - June 2016
Higher Level: Mathematics, English B, Serbian A1, Visual Arts
Standard Level: Physics, Social and Cultural Anthropology
• Graphics and physics programming using C++/DirectX 11
• Shader development via DirectX 11 and material editor/HLSL in UE4
• Game development using Unity/C# and UE4 blueprints
• AI programming using Unity/C# and behaviour trees in UE4
Position: Liquor Kiosk Staff member
Company: ABM Catering
Date: September 2019 - present
Contribution:
• Developed verbal communication skills by serving the customers
• Served in a position of trust, processing cash and card payments
• Trained and supported new staff on the use of equipment
Position: Volunteer at the dog shelter
Company: UWC in Mostar (CAS)
Date: September 2014 - June 2015
Contribution:
• Entrusted with the responsibility of taking basic care of the dogs (feeding, cleaning kennels)
• Performing repairs on the outdoor area of the establishment
Position: Member of Ecology CAS
Company: UWC in Mostar (CAS)
Date: September 2015 - May 2016
Contribution:
• Helped lead and organise the first Global Climate March in Mostar, 2015
• Worked in a team to clear the areas of city covered in waste
• Participated twice in Global Game Jam held at Staffordshire University
• Participated in two Junior Balkan Mathematical Olympiads
• 8 grades of music school, primary instrument guitar, secondary piano
• Digital art
Available on request.
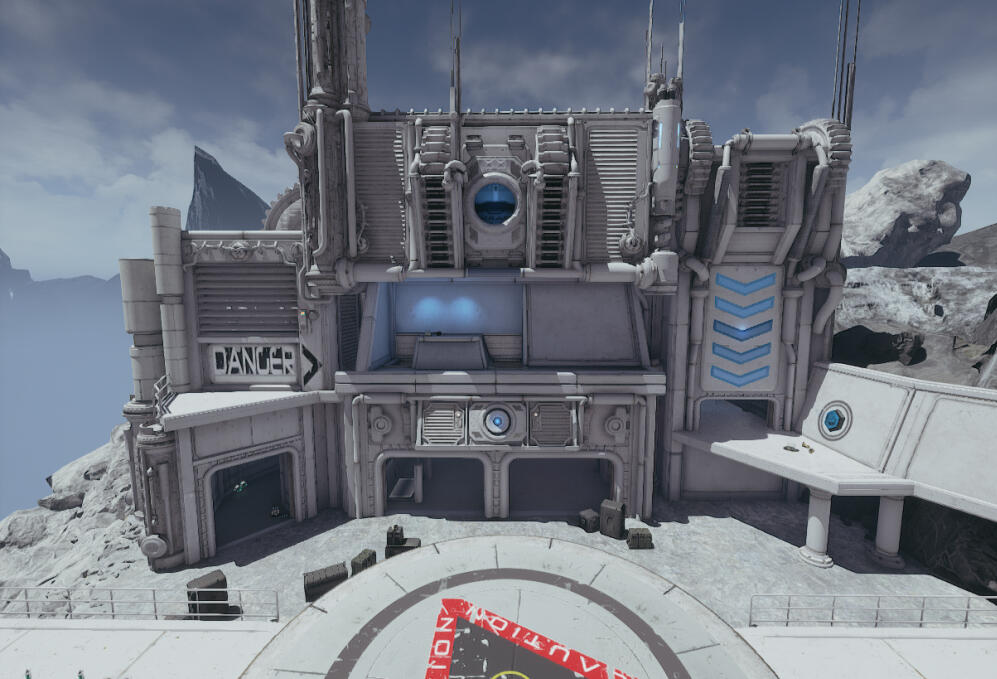
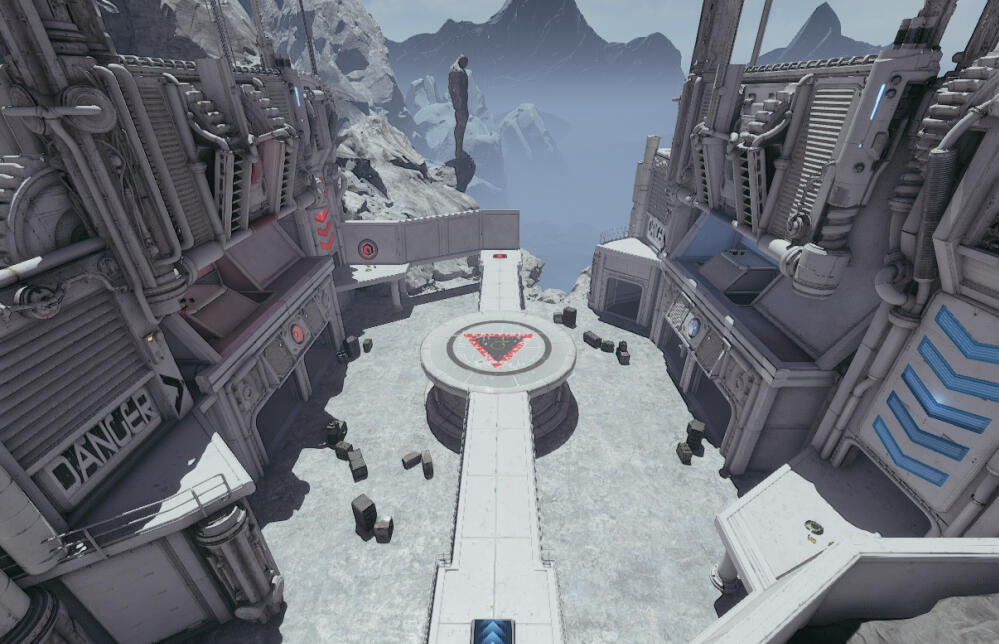
CTF-Cyclops is a Capture the Flag map I made in Unreal Tournament 4 editor in my first year of university. All the assets came with the editor we were told to use, and I chose to work with the assets used to create Outpost 23 map - which inspired the design of CTF-Cyclops.
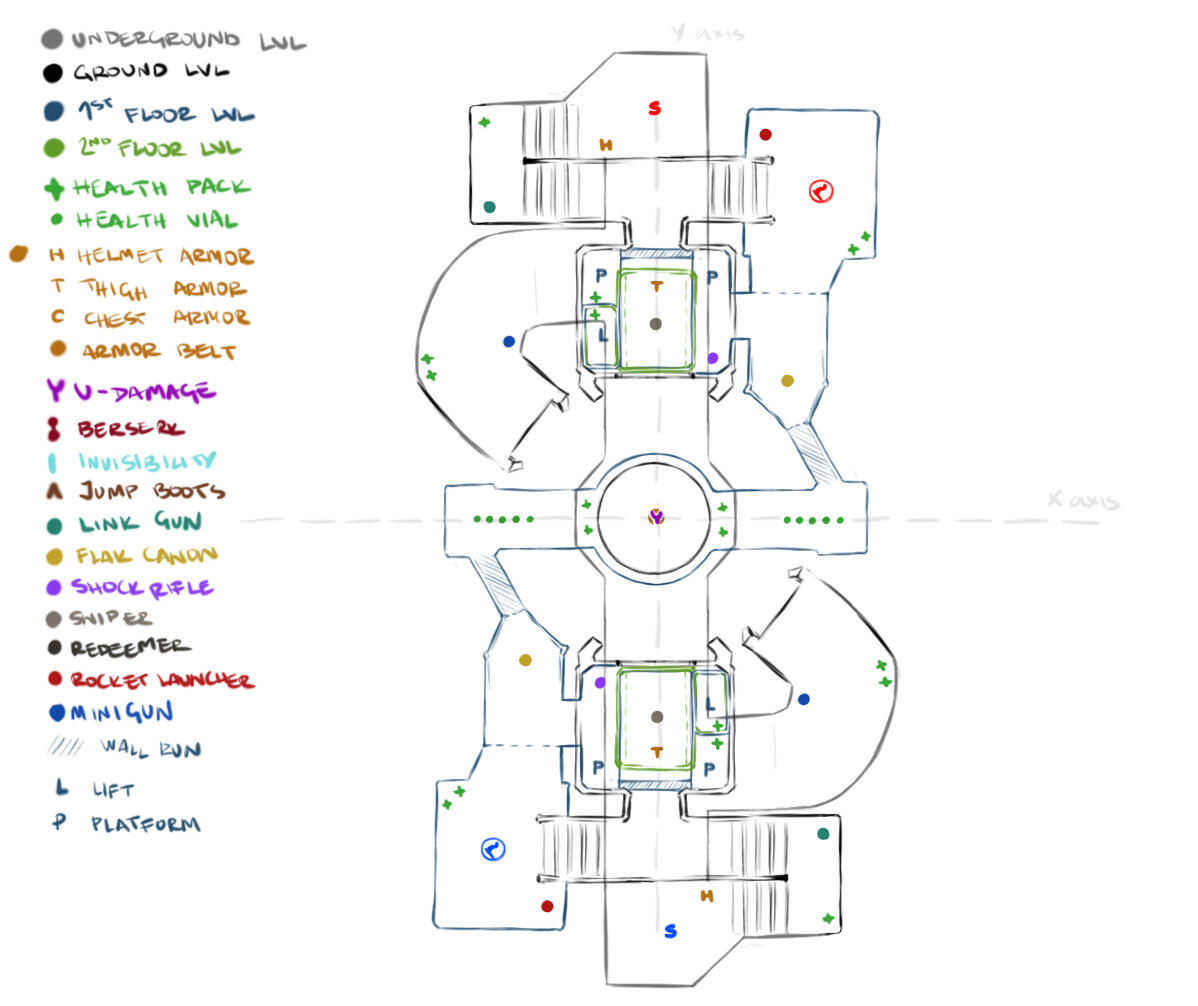
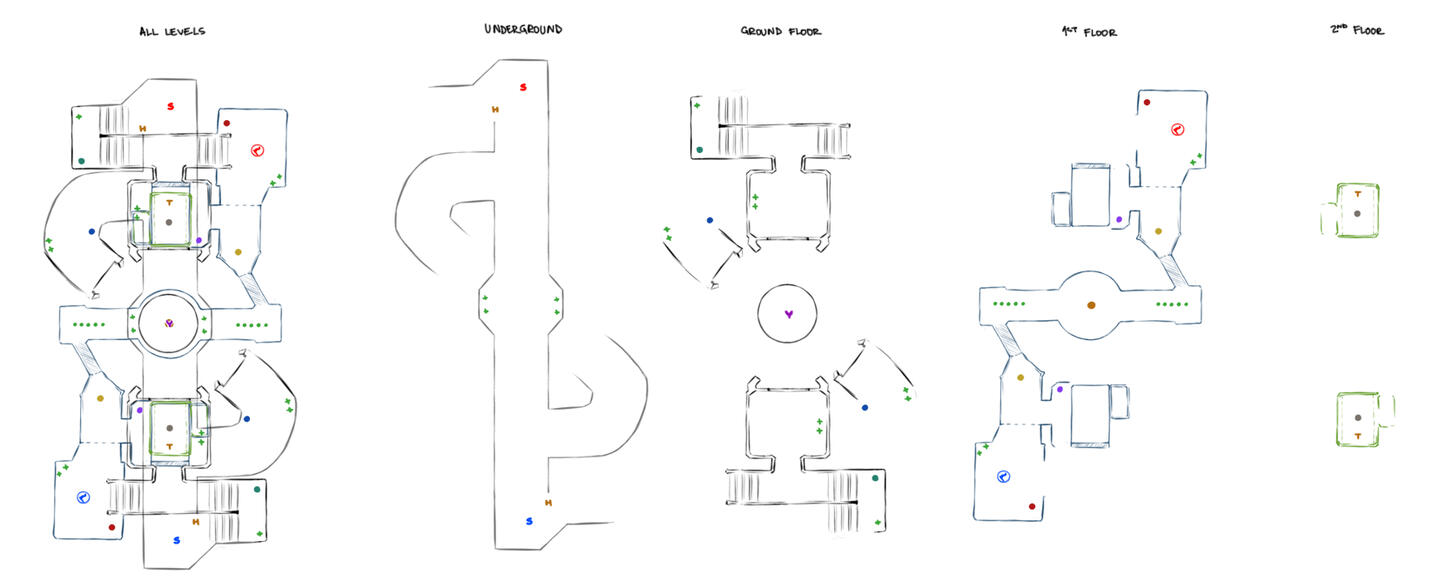
My aim with this design was to create a small map which would result in fast-paced gameplay and no place for camping. The final map has a couple of key differences from the sketch shown above.
I removed the underground hallway because it was a bad design choice for a multiplayer map. Instead, I kept one underground room with player starts on each side, and a death pit (used to be the hexagonal room in the centre) that has a Berserk power-up on a small platform levitating above it.
I also lowered the position of the sniper area. This area was tested and reworked multiple times as it was the common complaint from the playtesting sessions. For the final version, I made it as uncovered as possible to solve the issue of players hiding/camping in that area.
One of the last changes I made was adding a secret room with a Redeemer. The hallway leading to the said room is narrow and filled with pain volumes. Because the Redeemer is commonly regarded as a very "overpowered" weapon, I made sure that obtaining it presented players with a high risk-high reward scenario.
Made in Unity, version 2018.2.11, using C#.
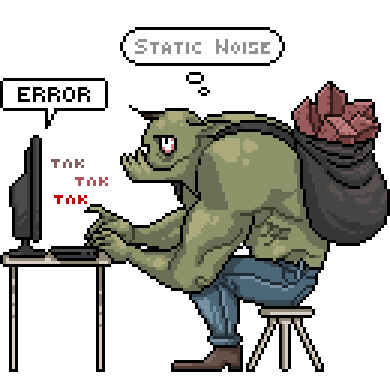
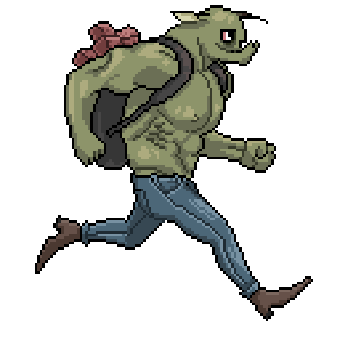
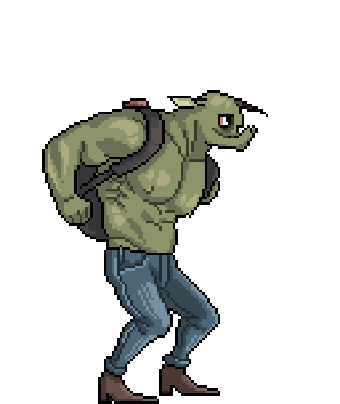
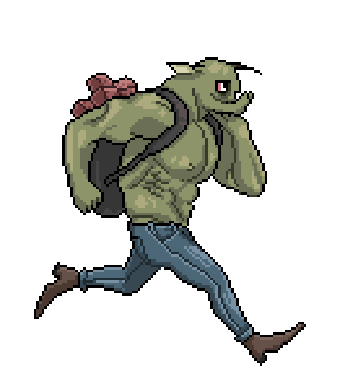
One More Day is a 2D survival platformer where the player fights to gather as many forest flowers as he can within a set time frame, because they are the key ingredient in creating a remedy that helps his terminally-ill mother survive for one more day.
Currently, the game features a dialogue system, simple AI and randomised sequence of pre-made level pieces with randomised item/enemy placement. The finished version of the game is supposed to also feature increasing difficulty, and choice of difficulty directly linked to the player's responses in the first dialogue he has with his mother.
The most interesting feature in my opinion, is the fact that this game doesn't have a HP bar, and it doesn't punish the player directly for his mistakes. Instead, it punishes the player by making him drop the flowers or decrease speed to waste more time, thus increasing the risk of his mother not surviving the day.
This was the result of Junior-Senior Collaborative Game Development from my second year. Made using Unreal Engine 4 version 4.20.3.
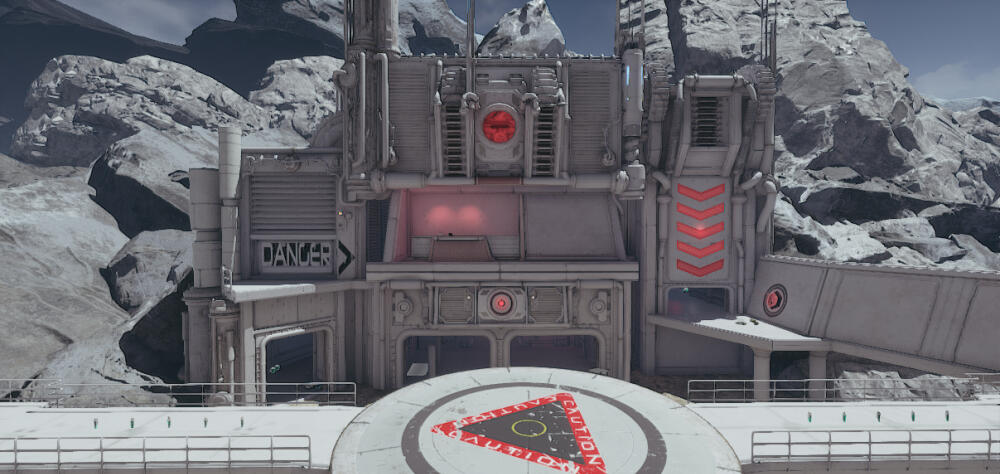
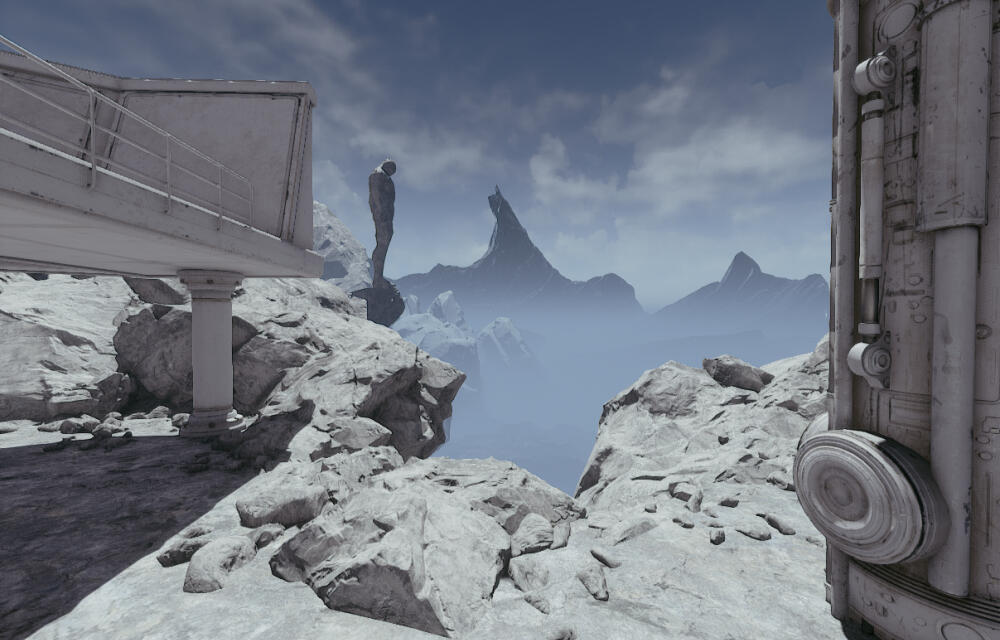
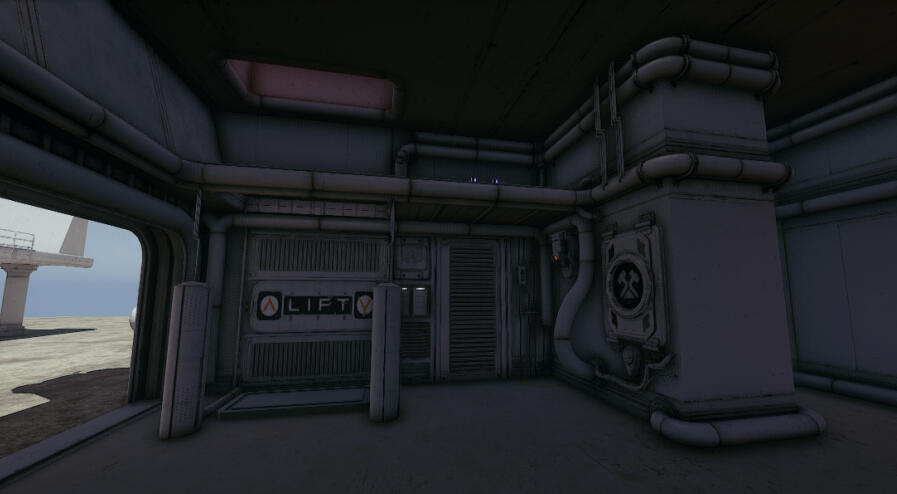
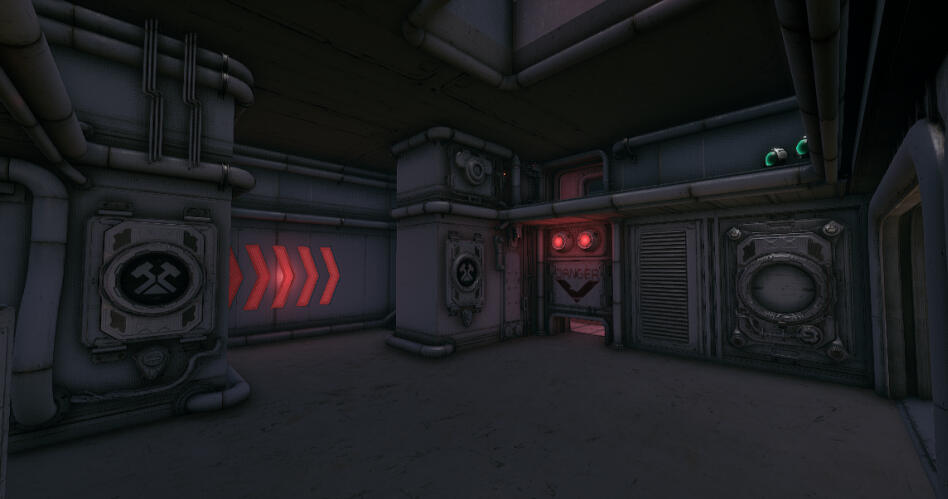
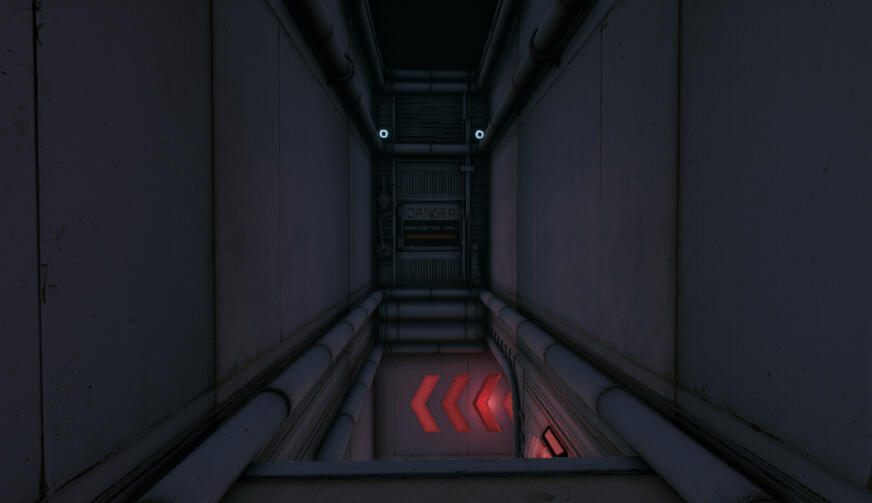
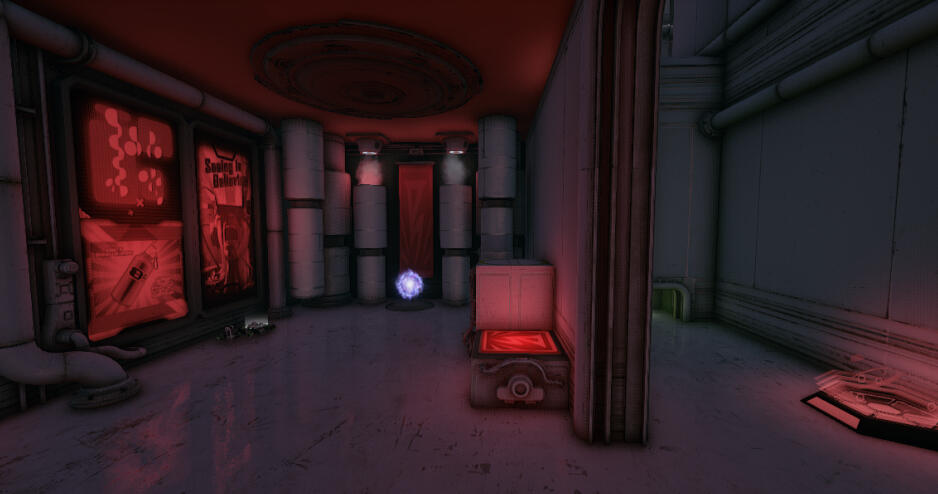
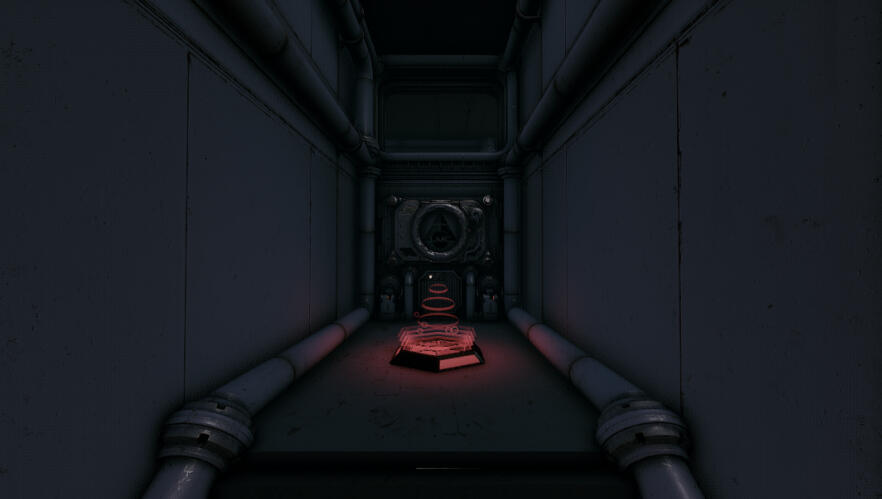
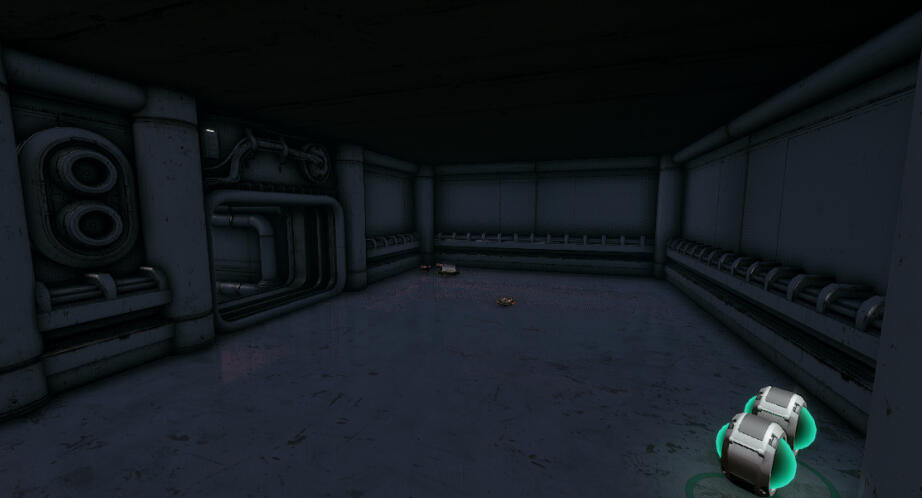
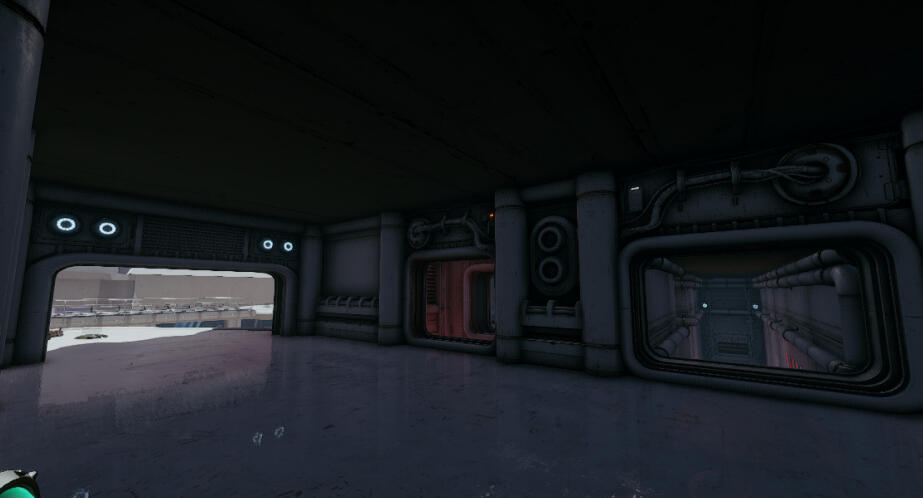
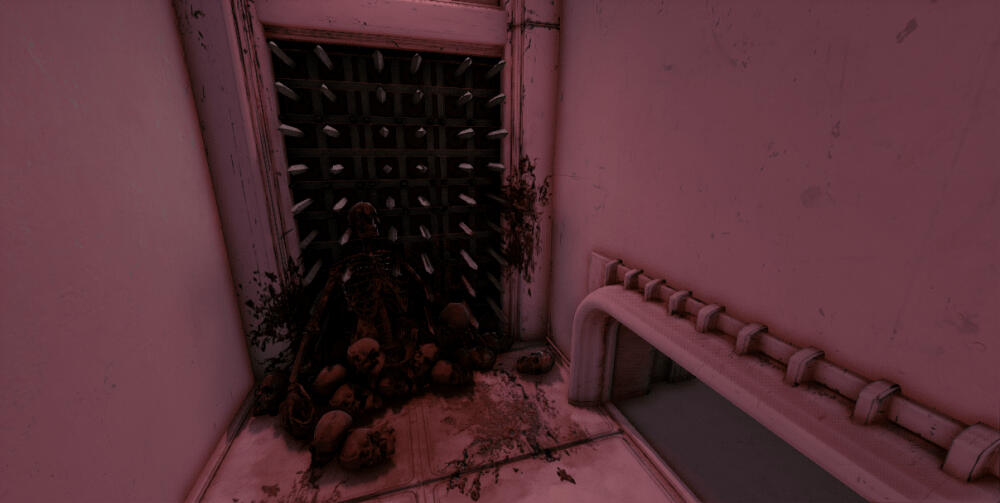
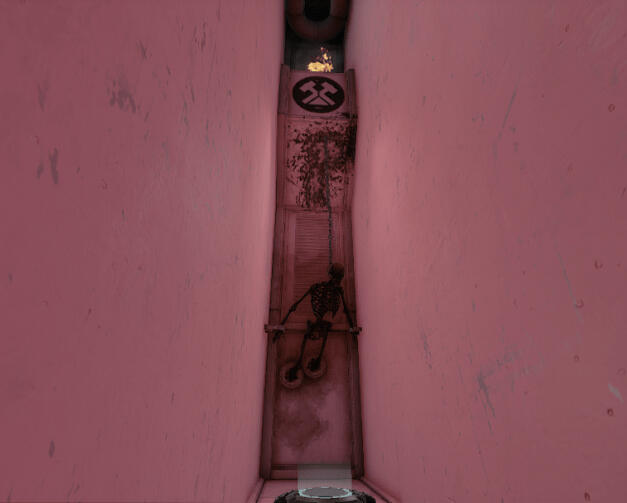
The Descent is a first person survival horror game about a doctor who's searching for his missing wife in a laboratory infested with zombies. I worked as a tech on this project.
I don't own the idea or the project itself, it rightfully belongs to the senior group I worked with. You can find the full list of names and credits in the trailer video.
In case you're interested in the timeline and process of my work on this project, I've also included a playlist containing the mechanics I've done:
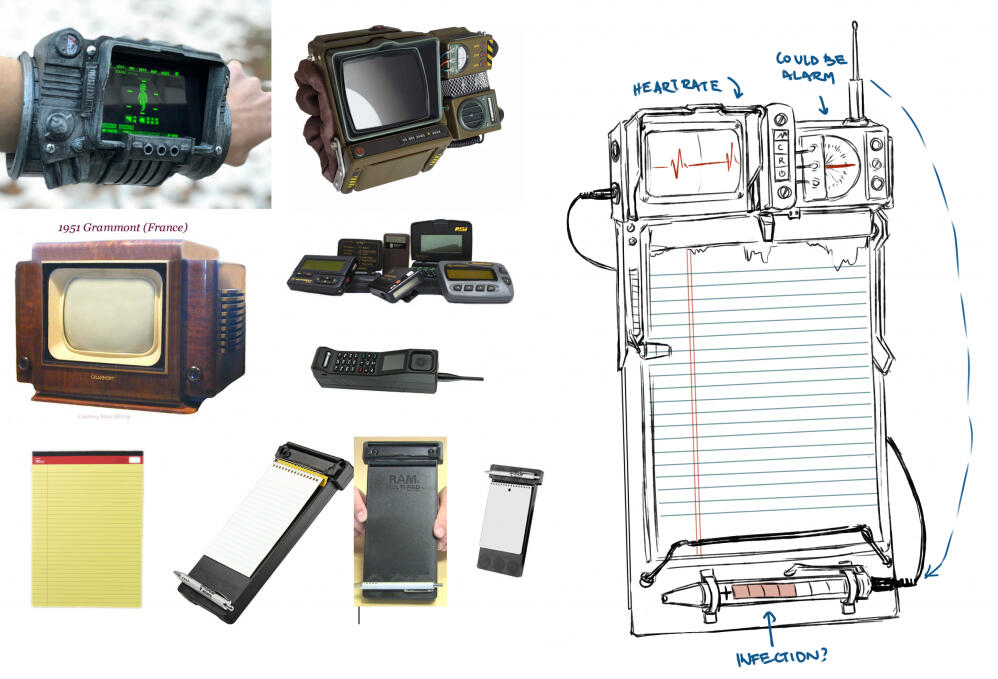
Lastly, here's the rough concept for the UI I made (with some references for the art team).
This was my first year project that I grew so attached to, that I decided to rework it during my third year, in Unity version 2019.2.4, using C#.
BOOTLEG is a small scale 2D endless runner. The main idea behind it was that you could choose your character, and your enemies for the purpose of taking your anger out on them.
(All character assets taken from Unity Asset Store)
At the moment, this game features one playable character and two types of monsters. Ideally, I would like to expand this game from other people's suggestions and add in monsters based off their personal demons, and playable characters based off themselves.
The game features randomly generated level platforms, and a Rage Timer. If the Rage Timer runs out and the player didn't kill any monsters, the player will spontaneously combust. The game also contains three types of power ups: teddy bear that temporarily freezes the timer, instant noodles as shield, and coffee as health pick up (student's main buff).

Second year project made in Unreal Engine 4 version 4.20.3 using mainly blueprints.
Volatile Replica is a small, two-player game that offers Deathmatch and Arcade modes. The main feature of the game is its variety of ammo types, including elementals, laser/hitscan, ricochet bullets and grenades such as MIRV, transfusion or stun. On top of that the players have the ability to spawn a clone which detonates on impact with an enemy.
I should mention that the weapon types in this game have been heavily inspired by the Borderlands franchise. The UI icons are based off real life hazard signs.
The Deathmatch mode is timer based and reserved only for local multiplayer. The Arcade mode is available for both single and multiplayer. The player is given three lives and the enemies are spawning endlessly. The game features one unique map per mode.
The AI is present only in the Arcade game mode, and it includes 2 types of turrets: basic and grenade turret; and 4 types of enemy tanks: basic, armoured, self-detonating, and summoner tanks which can construct other enemy types and hide behind cover (implemented via EQS).
In the test videos below, the damage dealt is displayed in the top left corner, and the name of the weapon or AI type at the bottom of the screen.
FONT:
Meta Language by
Divide by Zero Fonts
BUTTONS:
Blue Scifi Style Buttons
by Abbas on PngTree
3D MODELS:
Low Poly Universe
by Dneproman on Unreal Engine Forums
Low Poly Nature Assets
by Jayanam Games on Patreon
Low Poly Resources Pack
by Jean Charpentier on itch.io
Low Poly Rock Pack
by Emerald Eel Entertainment on itch.io
Low Poly Environment Pack
by Korveeen on itch.io
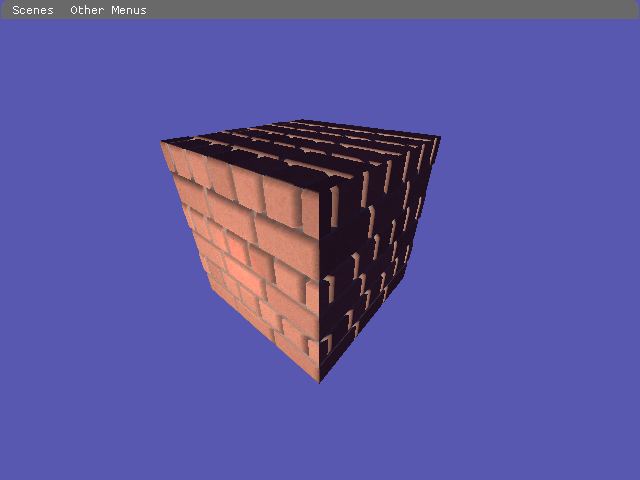
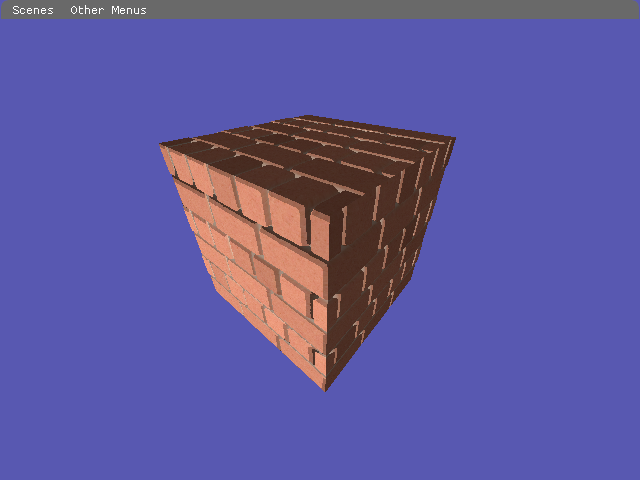
Essentially my DirectX 11 testing grounds. Written in C++.
C-Clone a small, WIP "engine" based off a framework we received in class (all classes prefixed with "d_" have been created by me). C-Clone features some visual effects, a couple of terrains, and a simple UI system done by using imgui. Other than that, there's not much to say about it, since its primary purpose is helping me wrap my mind around object-oriented and graphics programming and get better at it.
In the future I plan to finish implementing a particle and rigidbody physics system, and also add a deferred renderer, SSAO, at least one terrain LOD algorithm, voxel terrain, and particle systems.
I also plan to potentially recreate some effects from my FYP like the celshader or outlines. Here's a quick test of the celshader with parallax occlusion mapping (not on github yet):
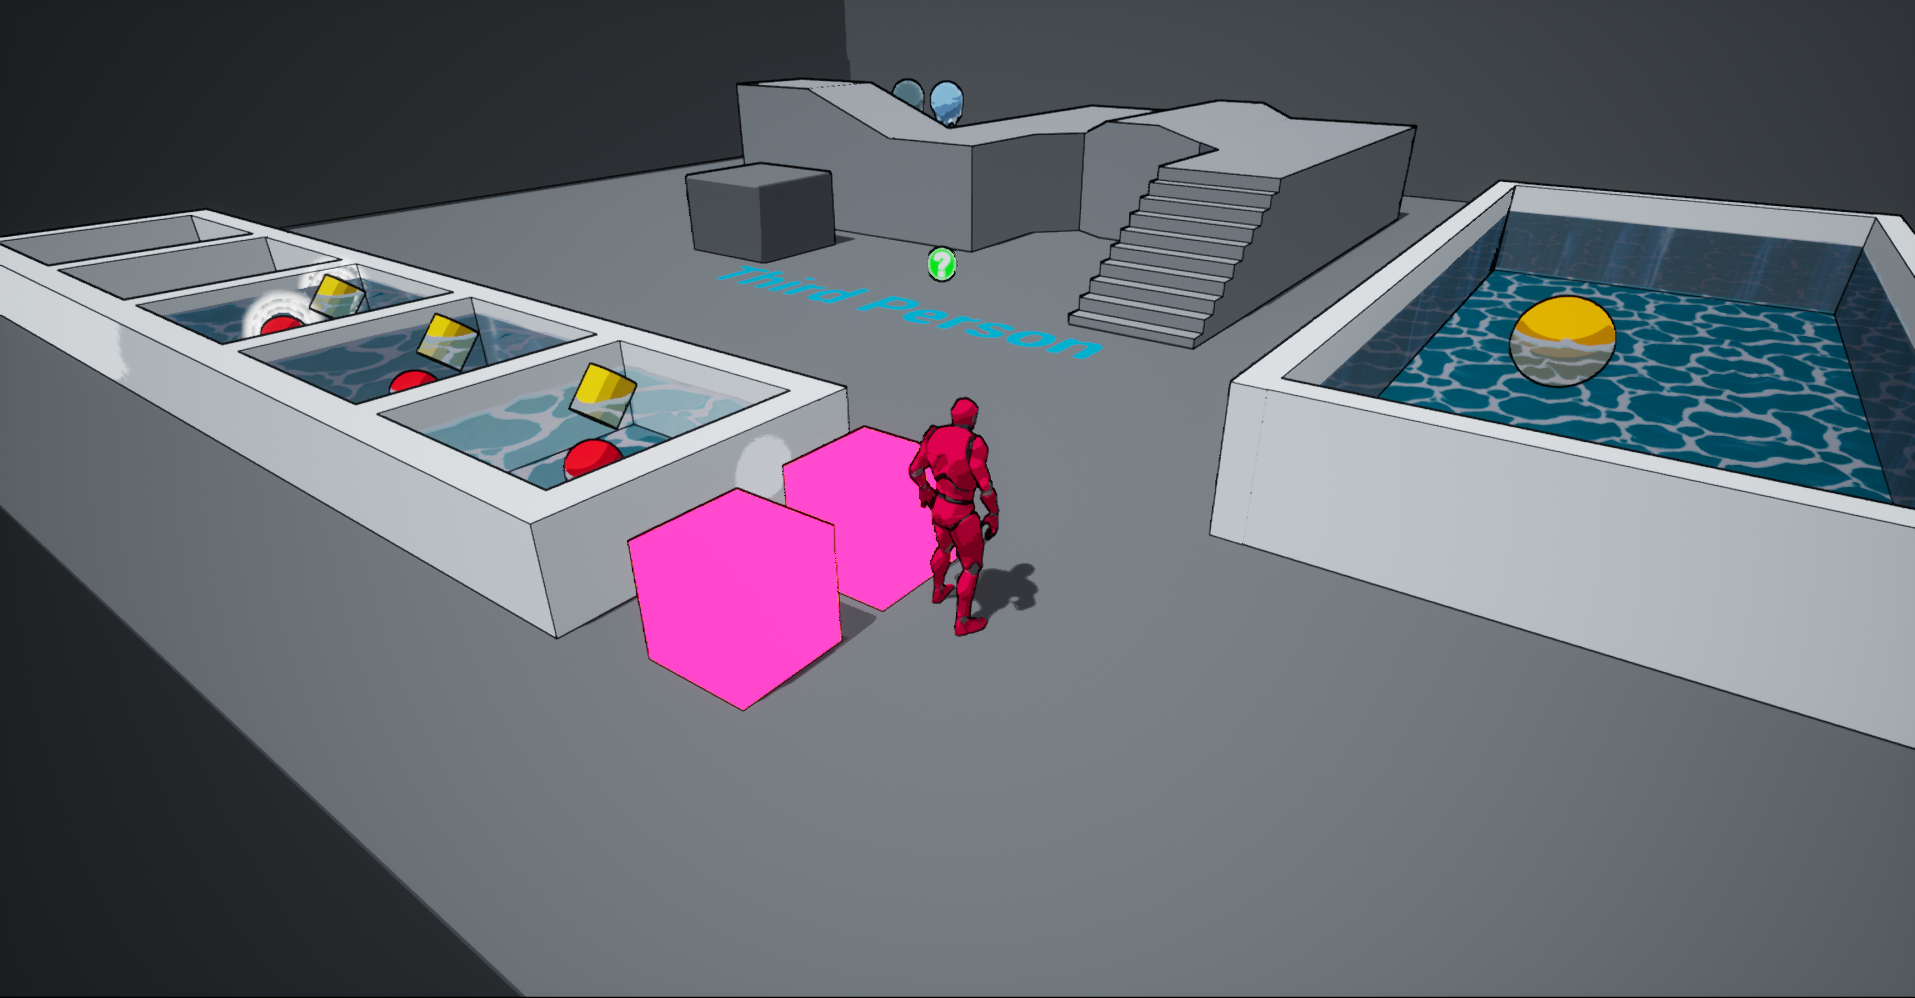
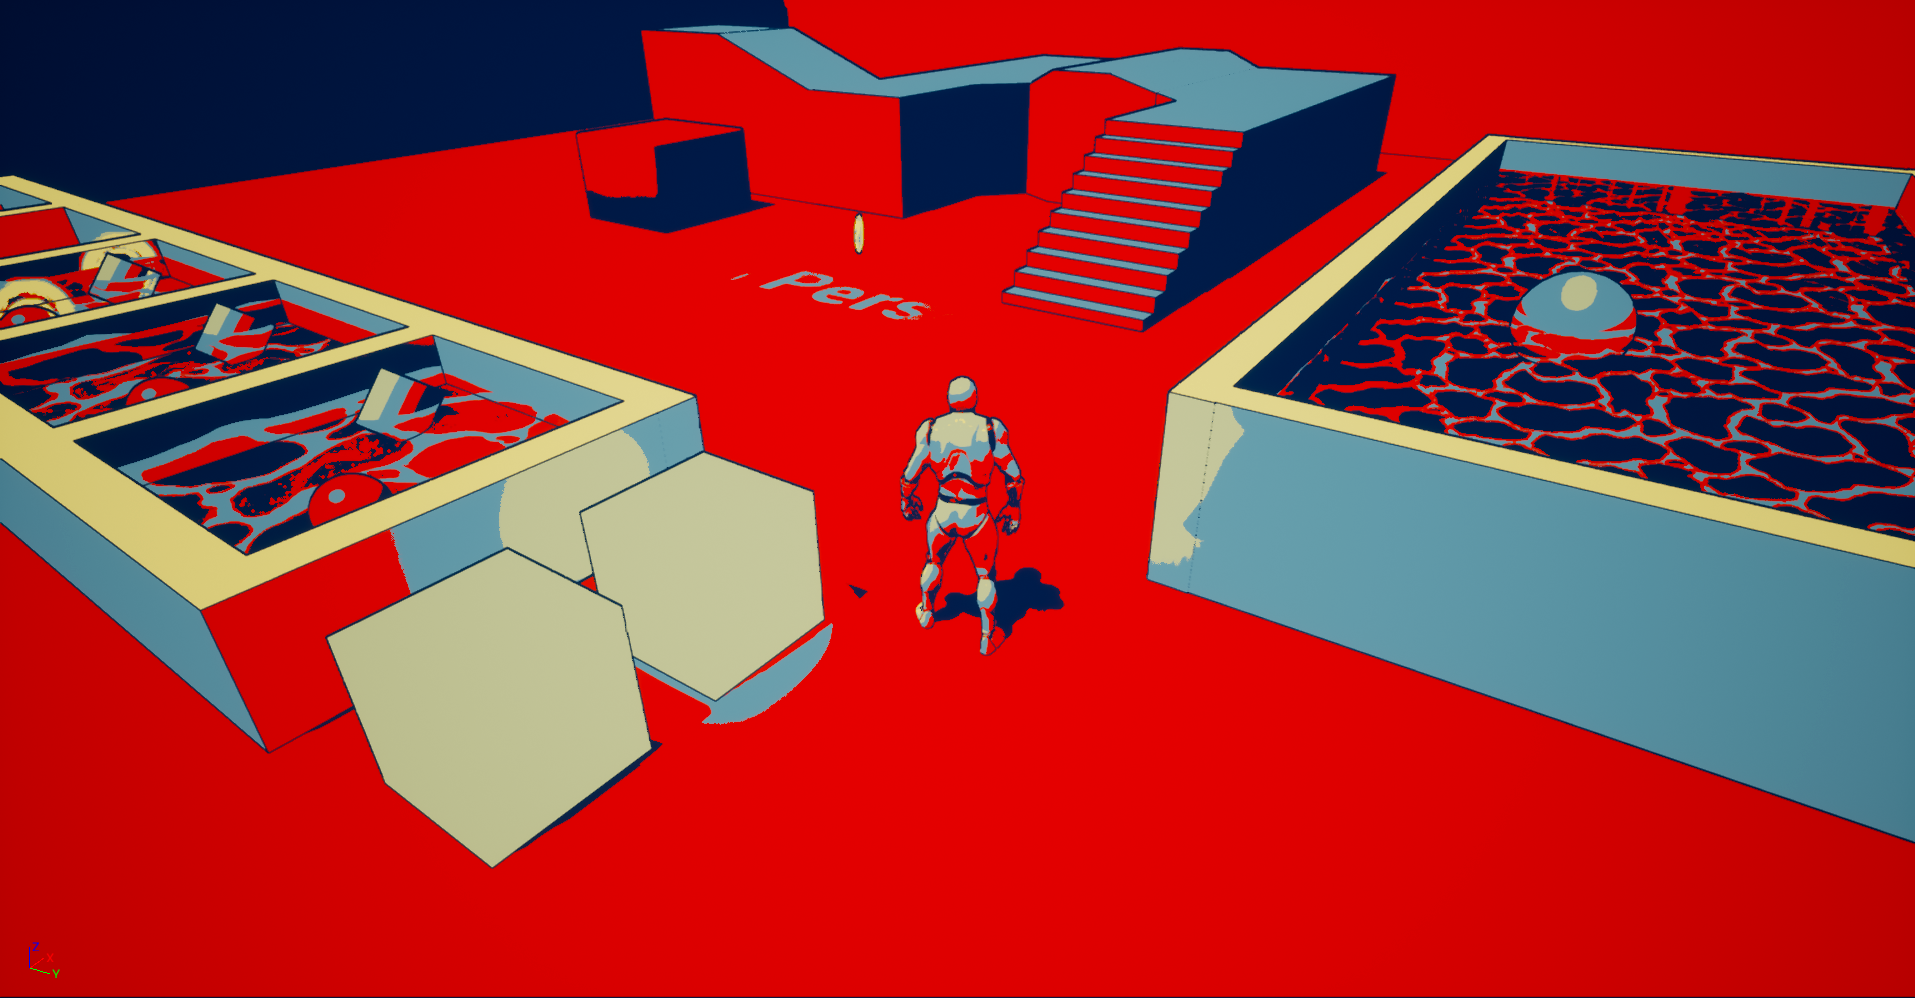
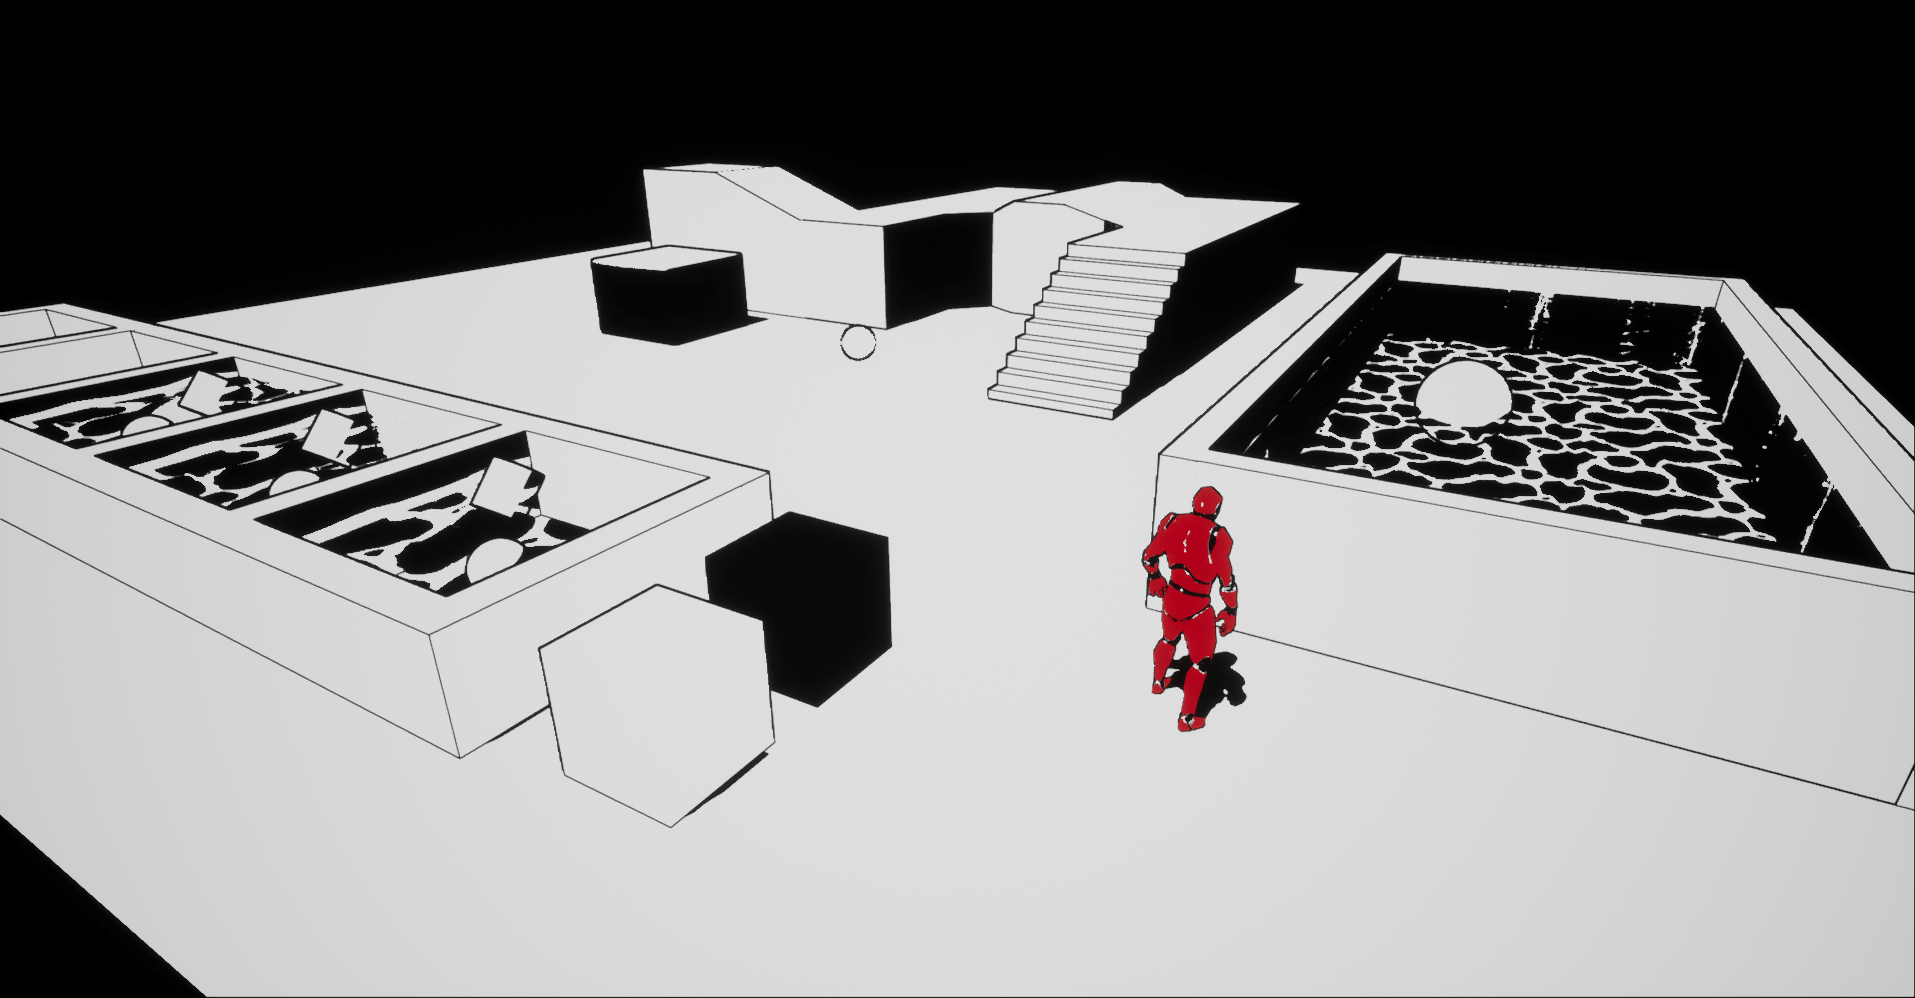
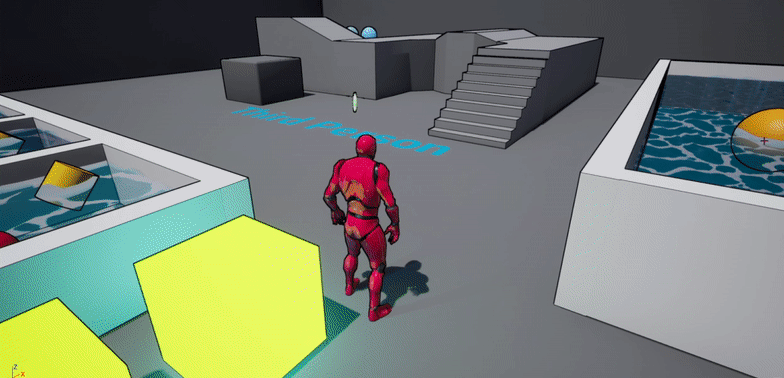
Done using Unreal Engine 4 version 4.20.3. Combination of material editor and HLSL.
The goal of my Final Year Project was to get a better understainding of UE4's material editor, material creation pipeline, and how I can use HLSL to create different effects.
In general, each post process effect I've created has multiple variations as I was trying to determine what techniques work better for which effect, and how versatile I can make them be. The surface materials in the project were mostly done to make it easier for me to grasp a certain concept before I use it on post process materials, which is why they have a smaller scope and aren't displayed in the general map. The material instances of finished final versions of the post process materials are highly customisable. I know this is not ideal for performance, but any of the final materials could be separated into smaller scoped materials, containing only the options relevant for what the user needs for their own project.
The project also includes two external packs: GRIM.exe and Stylized Desert Environment.
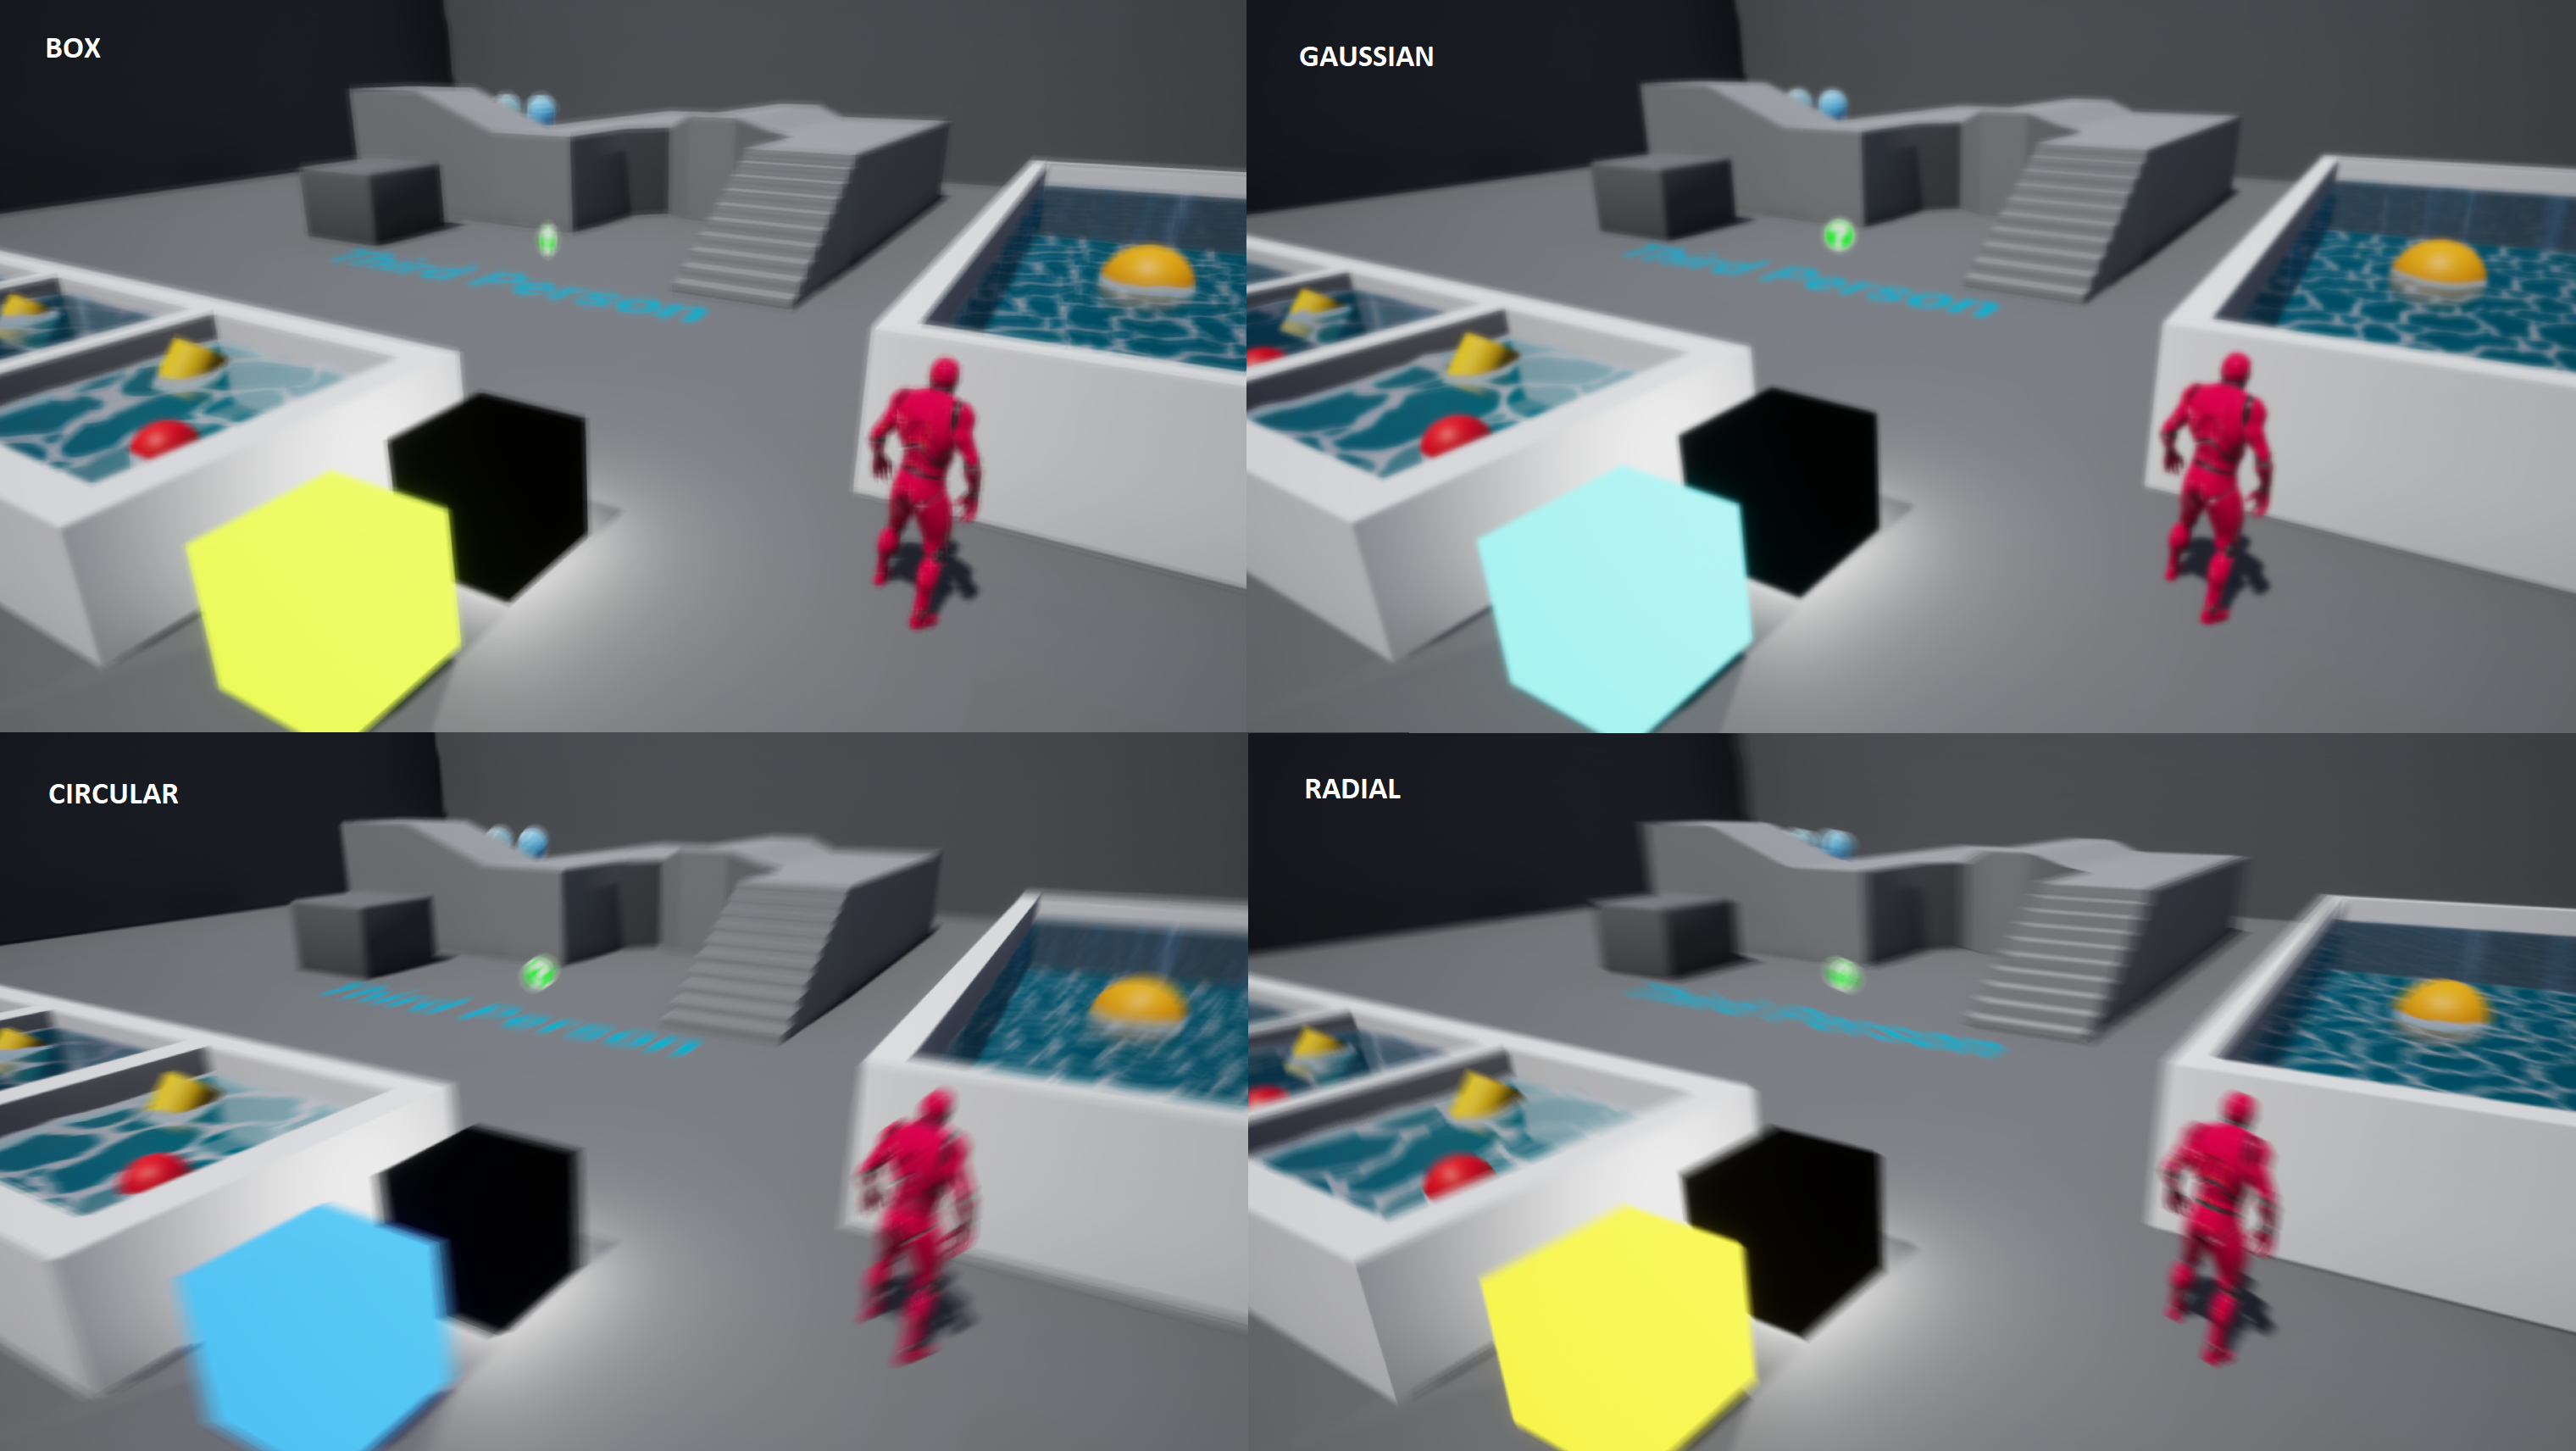
Blur types are one of the simpler/easier effects I've created. At the moment, I have finished versions of box (full and separable) and gaussian blur (with simplified and full formula).
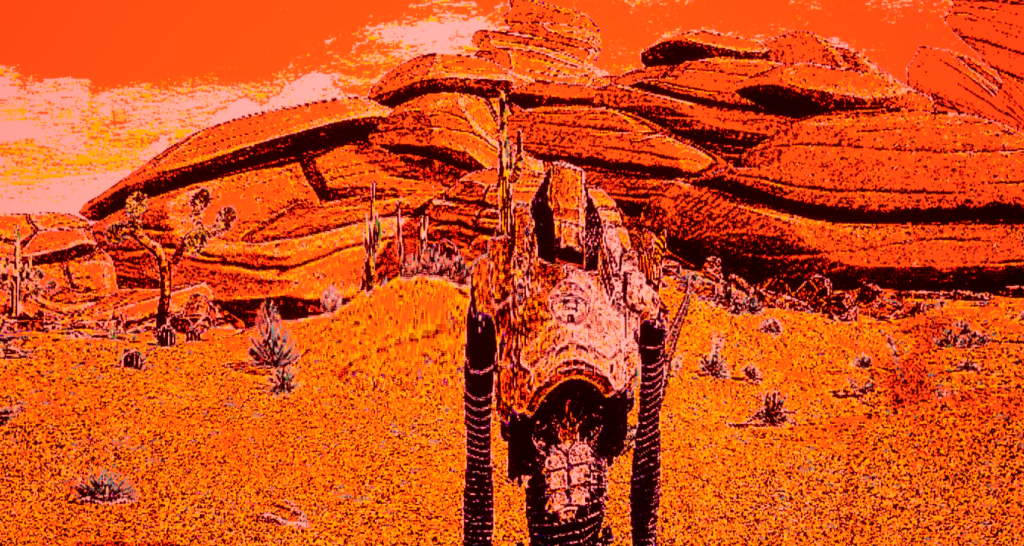
Cel shader is done fully in material editor (no custom expressions). There's a lot of examples online of a cel shader in UE4, but all of those have a variety of flaws such as not displaying metallic or emissive objects, not displaying the hues of lights in the scene, having the fog look odd, etc. I tried to solve as many of those issues as I could in my version of the cel shader.
The outline shaders in my project are based off laplacian and sobel edge detection, and there is one which is based off this tutorial by UnrealEverything user on UE4 forum.
Here's a bonus I made while playing around in the editor: an effect which is supposed to imitate the look of deep fried memes.
Here's a quick fixed hue changer node which can be added anywhere. It's one of the first HLSL nodes I created, so it's fairly simple.
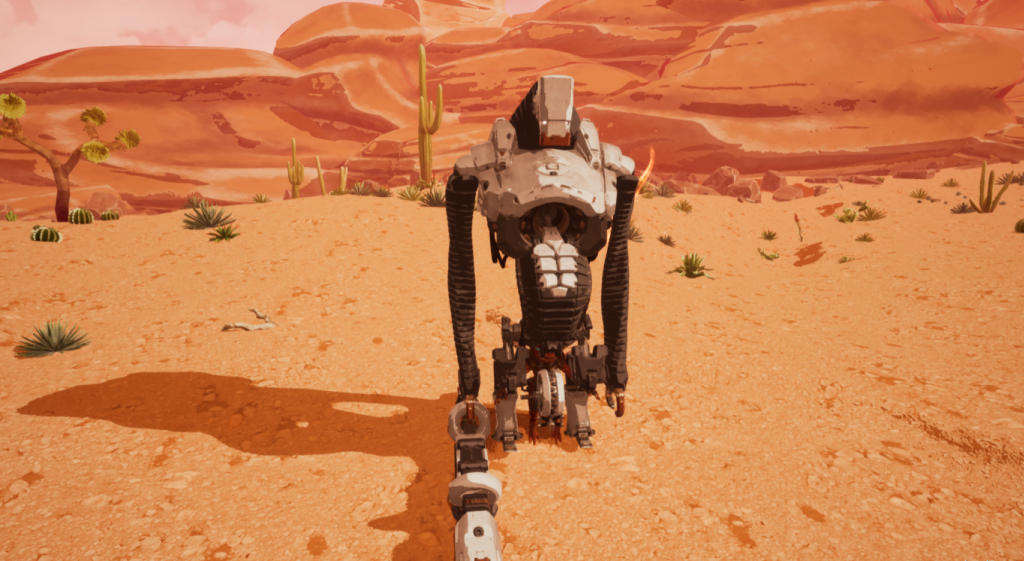
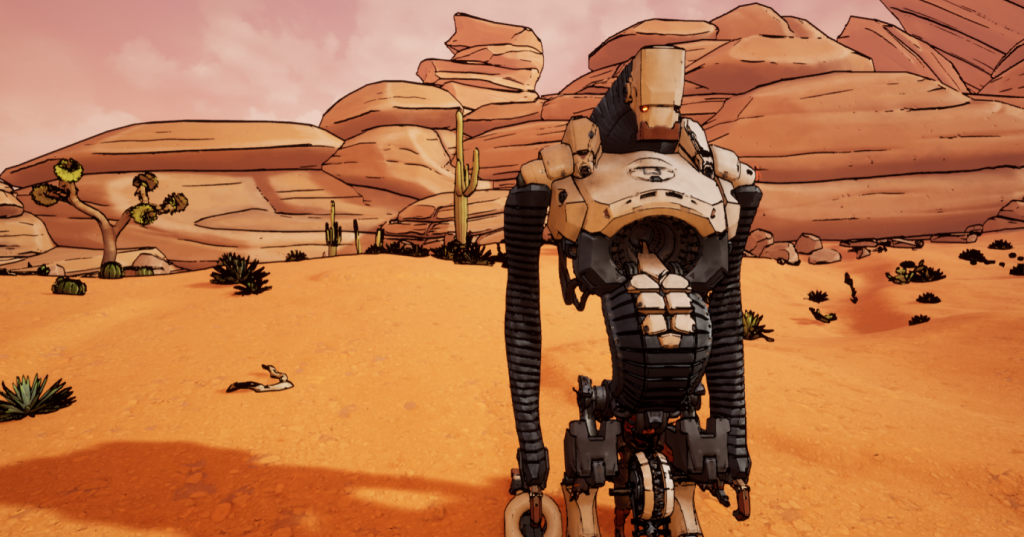
Done using Unreal Engine 4 version 4.22.3. Combination of material editor and HLSL. This project is also available on my itch.io account.
Nuck Toolbucket is the upgraded version of my Final Year Project. The goal was to get a better understainding of UE4's material editor, material creation pipeline, and how I can use HLSL to create different effects. Therefore, this project utilises many Custom Expression nodes which are a type of UE4 material editor node that allows you to add your own custom HLSL code. Here is a list of effects using such nodes.
Considering this was more meant as a learning experience, I tried to make most of the materials versatile and easy to adjust to different scenes. Some of the effects could be downscoped by removing unneeded features to increase performance.
To start off simple, I recreated box and gaussian blurs and also added radial and circular blurs to the project. Radial and circular blurs stem from the same material actually, since the method I used is based off this article.
Celshaders are done fully in material editor (no custom expressions). There's a lot of examples online of a celshader in UE4, but all of those have a variety of flaws such as not displaying metallic or emissive objects, not displaying the hues of lights in the scene, having issues with atmospheric and exponential fog, etc. I tried to solve as many of those issues as I could in my version of the celshader. The project features a standard 3-banded celshader, as well as one based off Shepard Fairley's Hope poster, and one based of the game MadWorld by PlatinumGames.
The outline shaders in my project are based off laplacian and sobel edge detection. The laplacian outline shader combines edge detection on world normals as described in this tutorial by UnrealEverything , and on scene depth. The sobel version performs edge detection on scene depth and actual scene (PostProcessInput0 texture). You can also see these effects being displayed in the Celshader section above.
In case the gif doesn't load, here's a video.
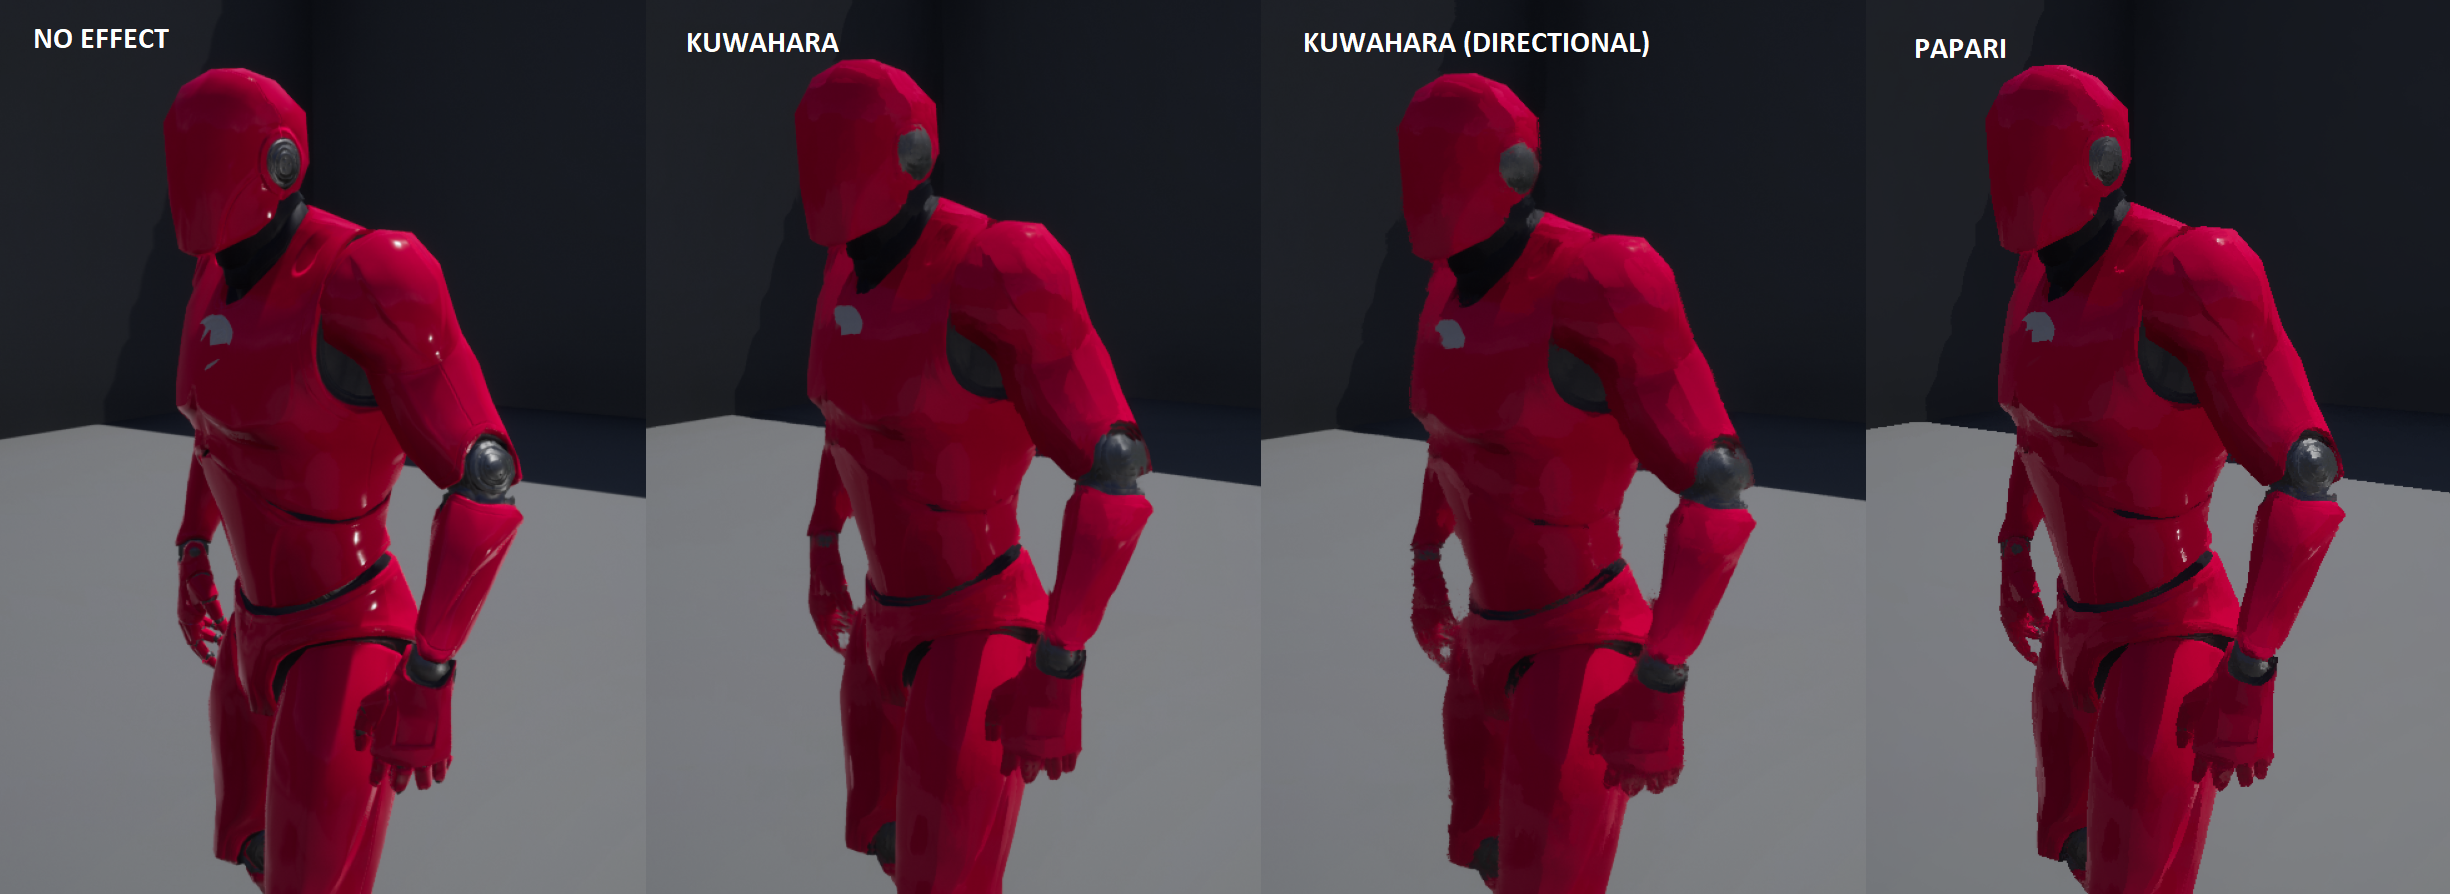
Two of the Kuwahara filters in my project is largely based off Tommy Tran's tutorial. The third one, however, is based off Papari method. At this point in time I still see some issues to be addressed with this filter, but I will keep working on it, hoping that I'll be able to create both the Papari and Anisotropic variations of the original Kuwahara filter.
The water shader I made is based off a Unity water shader by Minions Art. I used the textures and technique provided in this article, which I then adjusted to UE4. The effect is not identical, and there is room for improvement, but it taught me a new thing - working with render targets in UE4.
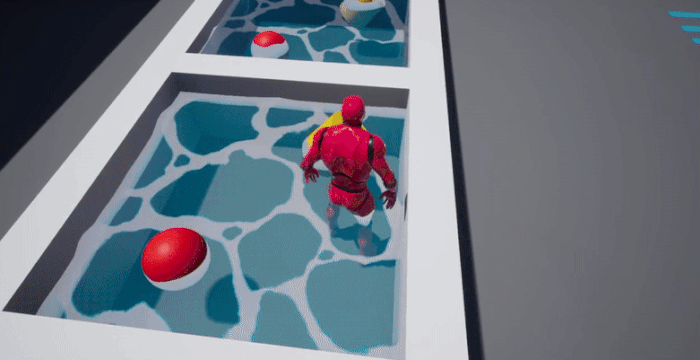
In case the gif doesn't load, here's a video.
Just an effect I considered for a game idea I had. It's one of those "lets see if I can" moments. The effect is fairly simple - it inverts the scene's y-axis, and it can have two different types of scene transition.
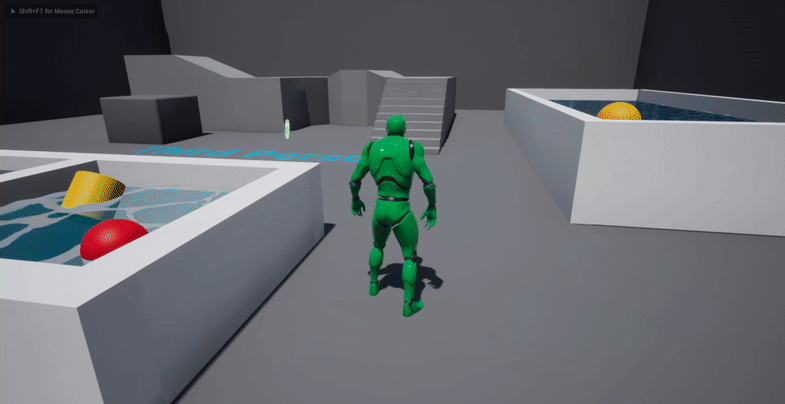
In case the gif doesn't load, here's a video.
Here's a bonus I made while playing around in the editor: an effect which is supposed to imitate the look of deep fried memes.
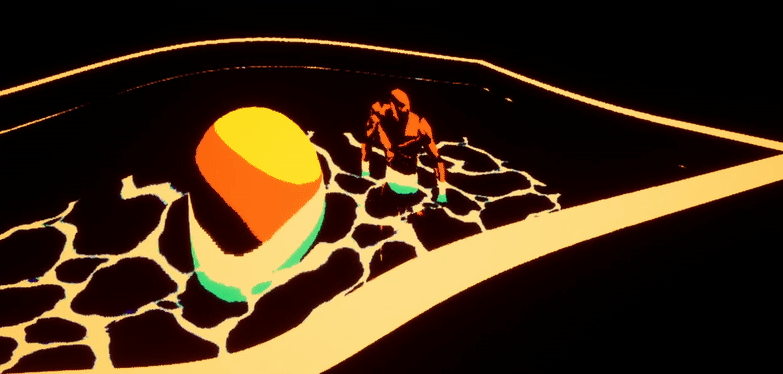
In case the gif doesn't load, here's a video.
In the future I would like to take a step away from convolution and image processing and focus on more realistic 3D-based effects and techniques to achieve them.
Minions Art: Original water shader in Unity, and water textures
Tommy Tran: Celshader, Gaussian blur, Kuwahara base versions
UnrealEverything: Laplacian Edge Detection on World Normals
Ben Cloward: Rain shader and other surface materials
Dean Ashford: Toon Ice surface material
Here are some additional explanations about how some of the effects work. I didn't
want to put these on the main project page because I feared it would get too cluttered.
If you download the project from itch.io, you would see a Shaders folder with many .usf files in it. .usf files are essentially UE4's version of shader files, and they are all written in HLSL.
You might also be familiar, in case you've watched UE4's livetraining on custom expression node/shaders that the rule is "for 99% of the effects, you don't need to use these nodes". That would be the reason I focused so much on image convolution and post processing effects in this project - they gave me a viable reason to use Custom Expressions to create effects since convolution usually requires loops and UE4's material editor doesn't support loops.
Currently the effects that utilise these nodes are:
There are some other minor nodes I used for testing which also use raw HLSL, but these are the main ones.
Every blur has a main blur file which performs the effect. For box blur there's a 2D version and a 1D separated version (most blurs can be separated into 1D components to save on performance by doing 2N instead of N*N calculations). Gaussian blur and Round blurs (circular and radial) also have a utility file. Round blur utility file performs transformations between cartesian and polar coordinates, while Gaussian's utility file performs the 1D gaussian function (distribution) by the formula:
(1 / √ 2 π * σ) * e(-x2 / (2 σ2)
The outline shaders perform edge detection either by using Sobel or Laplacian kernel, and they are applied to one of the three textures the GBuffer contains: PostProcessInput0 (actual scene image, tends to be quite noisy), WorldNormal (world normals, less noisy but weak on areas where the normals are facing the same direction), and SceneDepth (like world normals, it's less noisy, however it's weak on areas where the depth values are similar). Due to the downsides of each of these textures, the edge detection is usually performed on two of the textures and then if the lines are white, max is taken between the two images and that value is used to lerp between the actual scene and the colour of the outlines.
As for Kuwahara filters, the regular version is similar in nature to outline shaders since it uses a kernel to pick a colour between the four surrounding ones. The difference is that instead of one kernel, it uses a kernel consisting of 4 kernels, and then it picks the one with smallest variance. Anisotropic variation of the original effect uses a rectangular kernel rotated via a rotation matrix based off value outputted from 2 1D (X, Y) sobel operations. Arctan of the resulting gradient gives an angle of the line, a rotation matrix can be computed from with the standard rotation matrix formula. Then Papari version is more similar to original Kuwahara filter, except that it uses a circular kernel divided into 8 sections instead of 4 - which gives it a softer appearance than the other two.
This is obviously a very crunched down version of how these things work, but I'm trying to keep this post down at a reasonable size. Anyway, I hope this explanation helps a bit :)
My email can be found in the PDF version of my CV.
This is bold and this is strong. This is italic and this is emphasized.
This is superscript text and this is subscript text.
This is underlined and this is code: for (;;) { ... }. Finally, this is a link.
Fringilla nisl. Donec accumsan interdum nisi, quis tincidunt felis sagittis eget tempus euismod. Vestibulum ante ipsum primis in faucibus vestibulum. Blandit adipiscing eu felis iaculis volutpat ac adipiscing accumsan faucibus. Vestibulum ante ipsum primis in faucibus lorem ipsum dolor sit amet nullam adipiscing eu felis.
i = 0;

while (!deck.isInOrder()) {
    print 'Iteration ' + i;
    deck.shuffle();
    i++;
}

print 'It took ' + i + ' iterations to sort the deck.';| Name | Description | Price |
|---|---|---|
| Item One | Ante turpis integer aliquet porttitor. | 29.99 |
| Item Two | Vis ac commodo adipiscing arcu aliquet. | 19.99 |
| Item Three | Morbi faucibus arcu accumsan lorem. | 29.99 |
| Item Four | Vitae integer tempus condimentum. | 19.99 |
| Item Five | Ante turpis integer aliquet porttitor. | 29.99 |
| 100.00 | ||
| Name | Description | Price |
|---|---|---|
| Item One | Ante turpis integer aliquet porttitor. | 29.99 |
| Item Two | Vis ac commodo adipiscing arcu aliquet. | 19.99 |
| Item Three | Morbi faucibus arcu accumsan lorem. | 29.99 |
| Item Four | Vitae integer tempus condimentum. | 19.99 |
| Item Five | Ante turpis integer aliquet porttitor. | 29.99 |
| 100.00 | ||